Ticket Feedback Surveys
About Ticket Feedback Surveys
When building your ticket task, including a follow-up survey allows ticket owners to provide additional information directly from the ticket. This feedback can help assess the root causes for poor CSAT and NPS scores. Once built, follow-up surveys can be reused across different ticket creation tasks.
Ticket feedback surveys are only available if you have the ticketing feature in your organization.
Creating a Ticket with a Ticket Feedback Survey
- Navigate to the Workflows tab of your project.
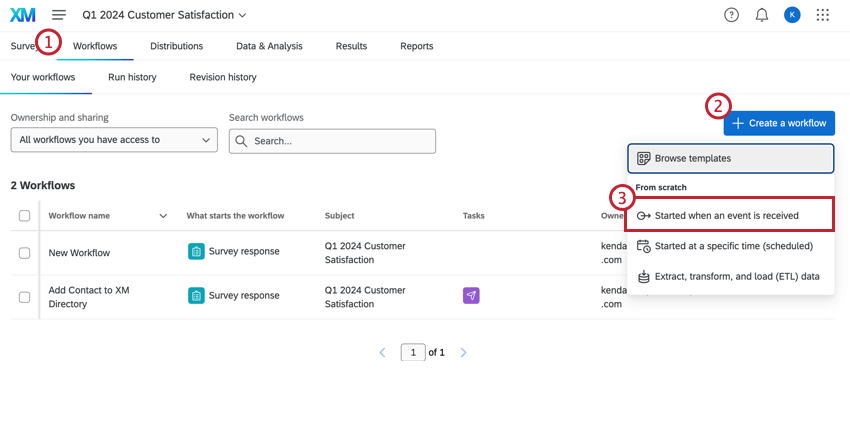
- Click Create a workflow.
- Select Started when an event is received.
- Select which event will start your workflow. More information can be found on the event-based workflows support page. Usually, this will be a survey response event.
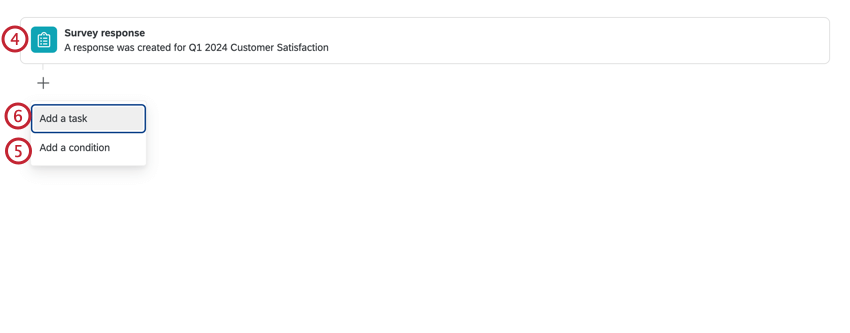
- If desired, click the plus sign ( + ) to add Conditions to your workflow, which determine when your workflow runs. See the linked page for more information.
- Click the plus sign ( + ) and select Add a task.
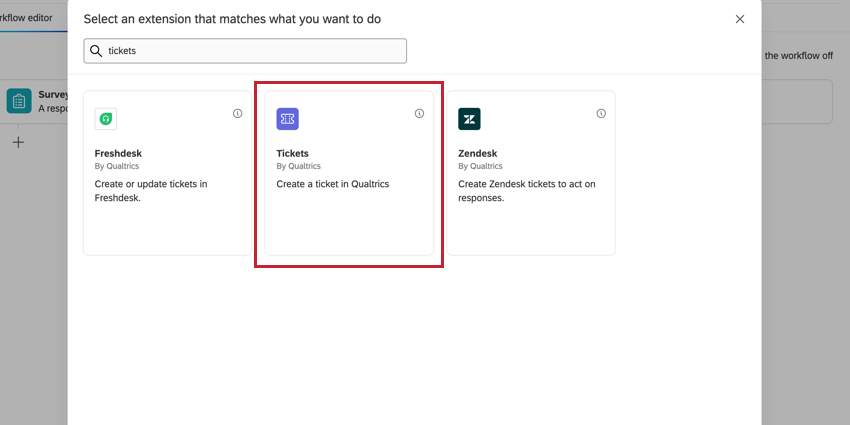
- Select Tickets.
- Complete the Priority, Ticket Name, and Owner fields. If desired, select a Ticket Group. For more information on setting up a ticket task, visit the Tickets Task support page.
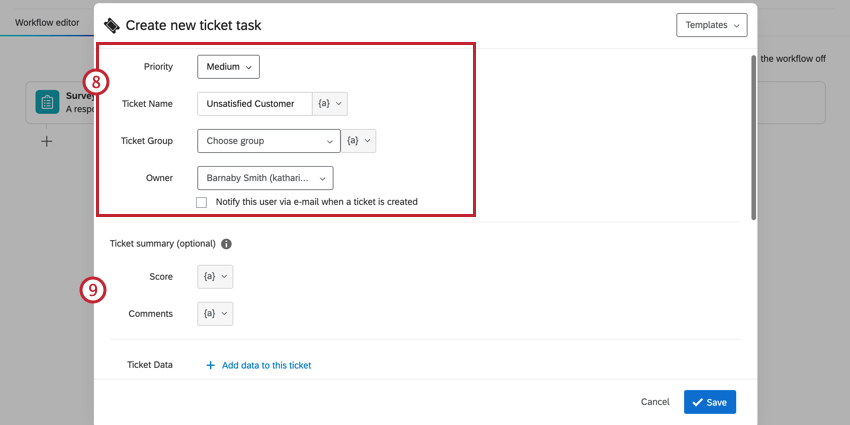
- If desired, set up the Ticket Summary or Ticket Data information.
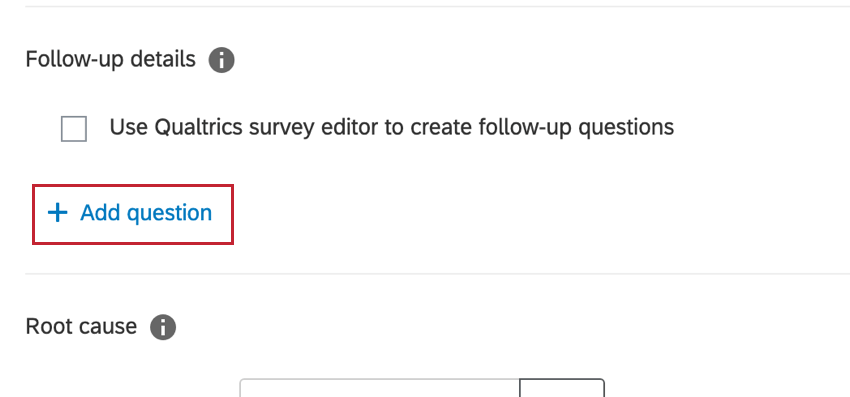
- Select the checkbox next to Use Qualtrics survey editor to create follow-up questions.
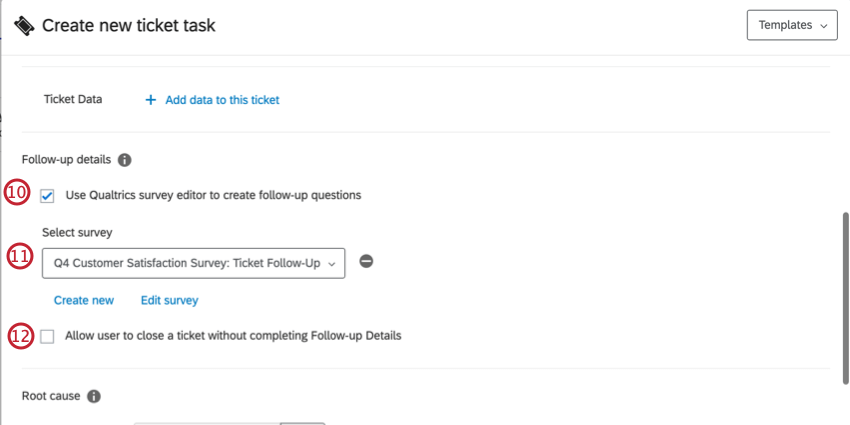 Qtip: If you would rather create follow-up questions directly in the ticket task, leave this box unchecked and select Add question. Once you add questions to the task, you cannot add a ticket feedback survey in the future. For more information, see Tickets Task.
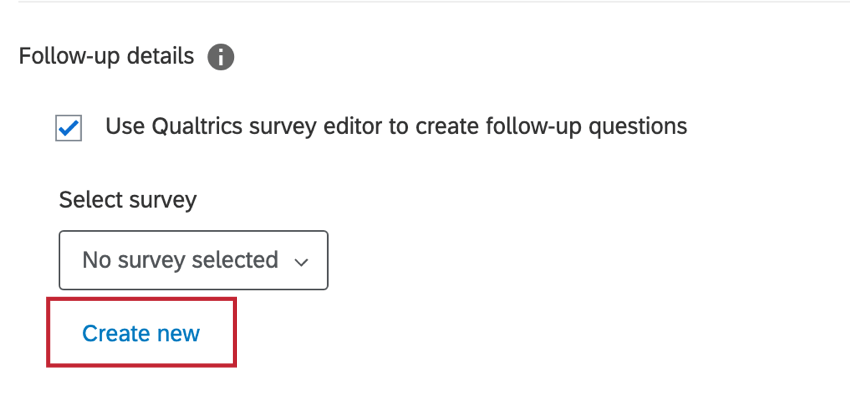
- Select an existing survey from the dropdown, or create a new one . To remove a selected survey, click the minus sign ( – ) to the right of the dropdown.
Qtip: Surveys must have the “Ticket Feedback” project type and be published in order to be included in the dropdown.
- To make the follow-up survey not required, select the checkbox next to Allow user to close a ticket without completing Follow-Up Details
- Add any relevant root causes for your team to select from.
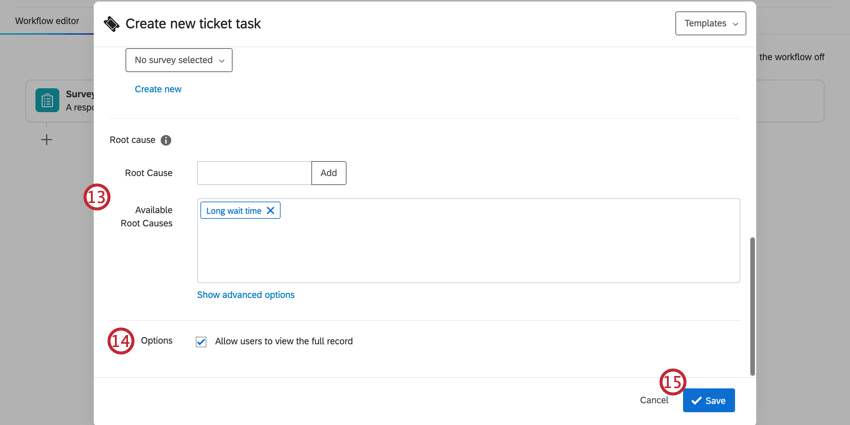
- If you’d like your team to see the customers’ feedback, click the checkbox next to Allow users to view the full record.
- Click Save.
Creating a Ticket Feedback Survey
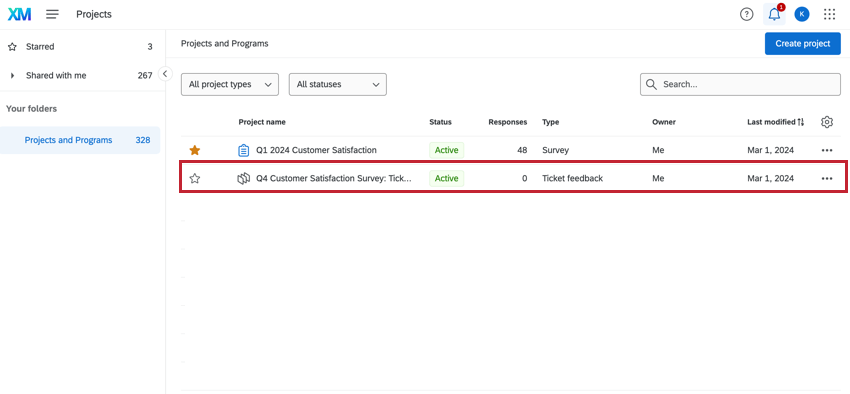
A follow-up survey works similarly to other survey projects except they have a different project type, which is Ticket Feedback. While these project types can be viewed, edited, and deleted in the projects tab, they must be created in the Ticket Task.
- Complete steps 1 through 10 of the Creating a Ticket with a Ticket Feedback Survey section.
- Select Create new.
- Enter a name for your ticket feedback survey.
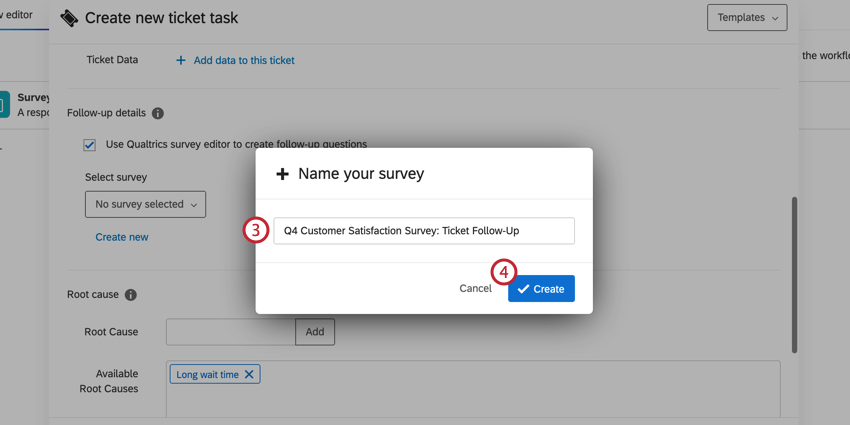
- Click Create.
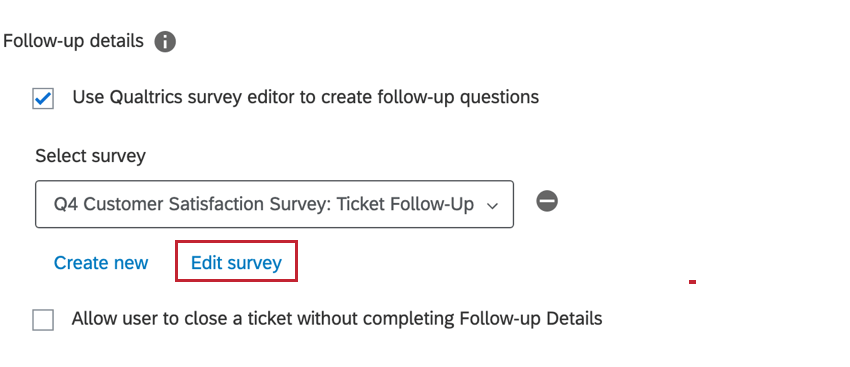
- Click Edit survey.
- Create the follow-up survey. See Survey Basic Overview for more information, tips, and guidance.
- Once completed, click Publish to publish your survey.
Qtip: Follow-up surveys must be published in order to be available in tickets.
Using Ticket Feedback Surveys
Once your ticket task workflow has been triggered, tickets will be created and assigned to the relevant ticket owner. The ticket owner can view their tickets in the Follow-Up page.
- Select Tickets from the global navigation.
- Click on the ticket assigned to you.
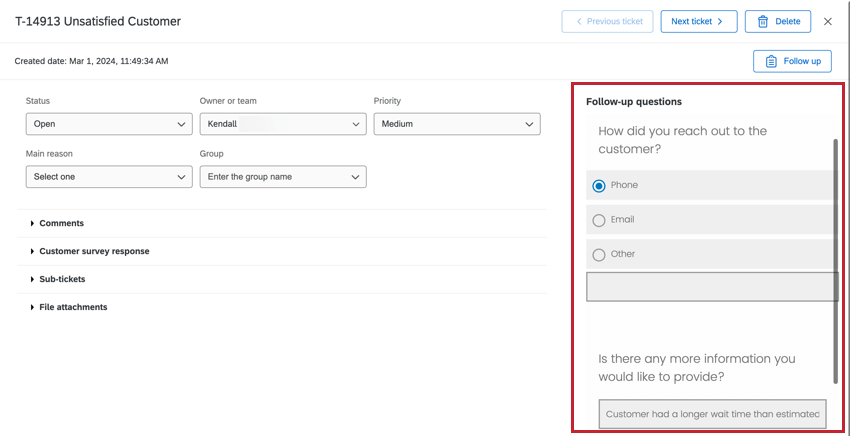
- Complete the ticket feedback survey, which will appear on the right side of your ticket.
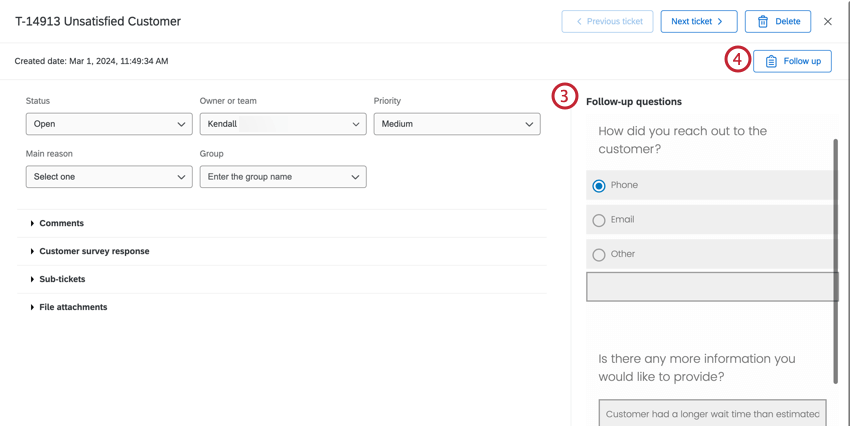 Qtip: Ticket owners can respond to a follow-up survey multiple times until the ticket is set to Closed. Once closed, the follow-up survey cannot be edited without re-opening the ticket.
 - Click Follow up to open and close the follow-up questions side pane.
Using Ticket Feedback Survey Data in the Data Modeler
In order to use the ticket feedback survey in the data modeler, the following steps must be completed before the survey is distributed:
- Open your ticket feedback survey.
- Navigate to the Survey Flow.
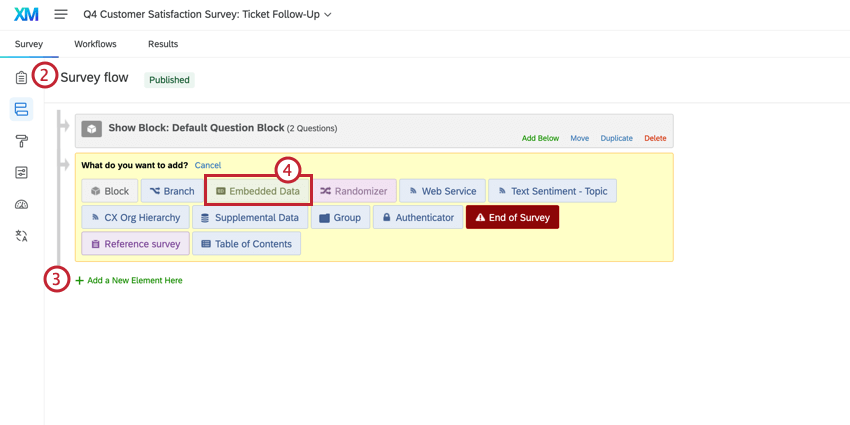
- Click Add a New Element Here.
- Select Embedded Data.
- Add the fields: ticketKey, sourceSurveyId, sourceResponseId.
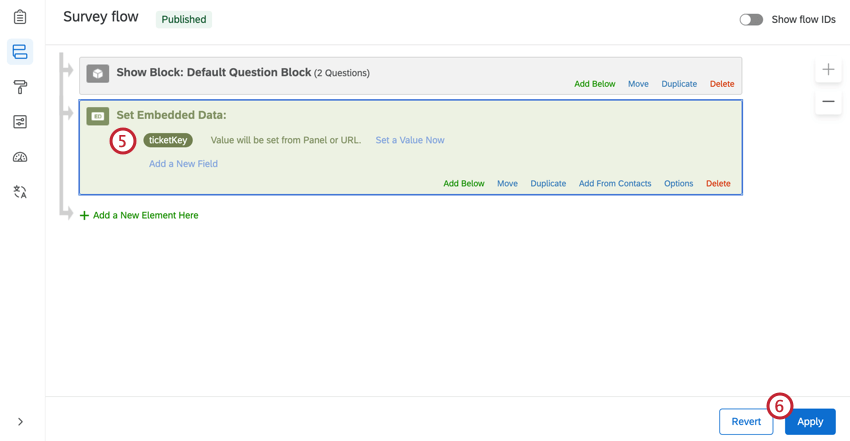
- Click Apply.
CREATING A DATA MODEL WITH YOUR TICKET FEEDBACK SURVEY
- Create a Data Model.
- Add these data sources:
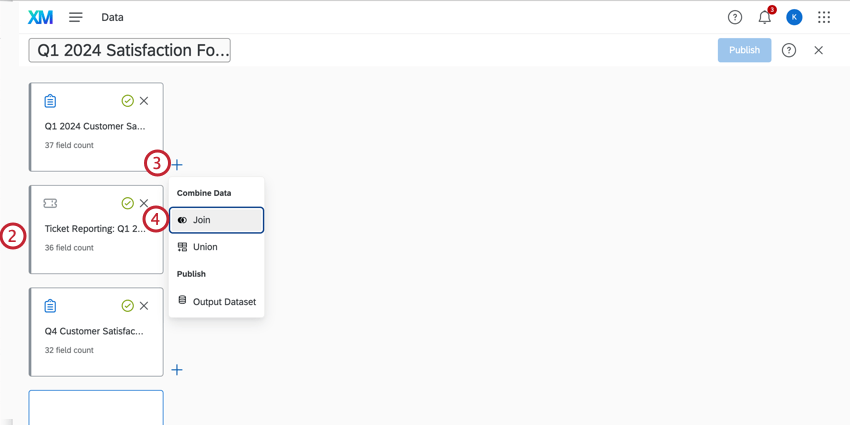
- Primary survey.
- Ticket reporting for the primary survey.
- Ticket feedback survey.
Qtip: For more information on setting up a data model, see Creating a Data Model (CX). - Click the plus sign ( + ) next to your first data source.
- Select Join.
- Underneath the Right dropdown, select the ticket reporting source.
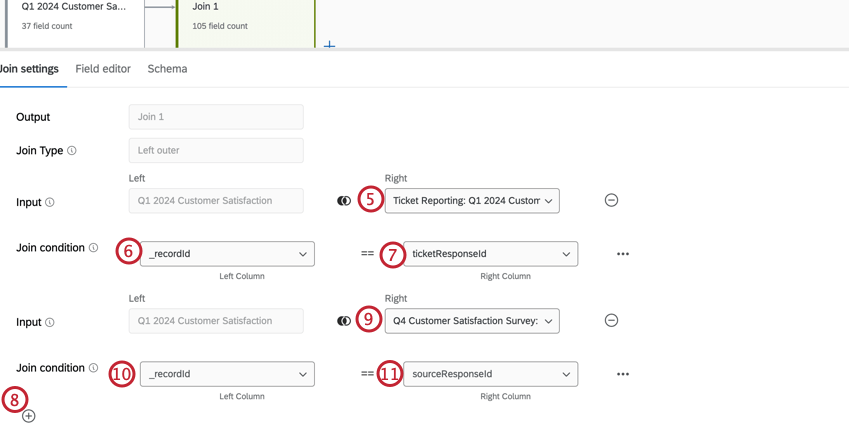
- In the Left Column of the Join condition, select _recordId.
- In the Right Column of the Join condition, select ticketResponseId.
- Click the plus sign ( + ) to add another join condition.
- Underneath the Right dropdown, select the ticket feedback survey source.
- In the Left Column of the Join condition, select _recordId.
- In the Right Column of the Join condition, select sourceResponseId.
- Click the plus sign ( + ) next to the Join element.
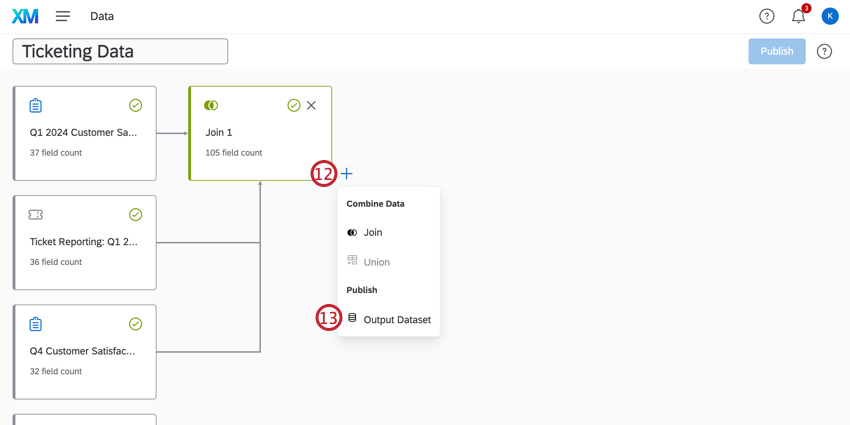
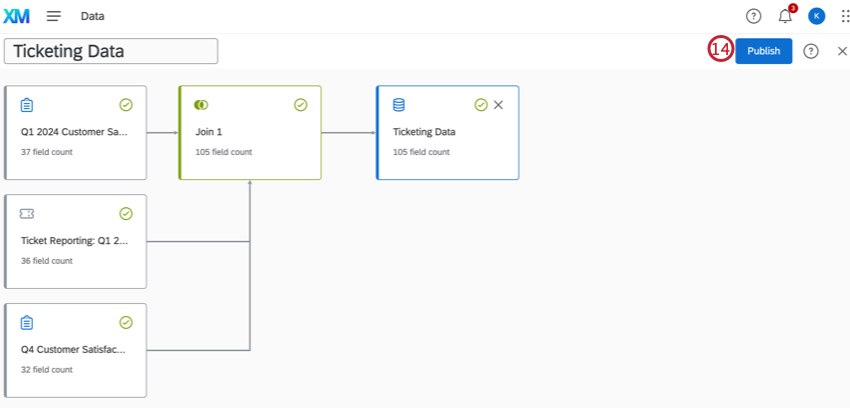
- Select Output Dataset.
- Click Publish.
Editing a Ticket Feedback Survey
Follow-up surveys can be viewed, edited, and deleted in the projects tab. When you’re in the project list, remember that these surveys are the Ticket Feedback project type.
Alternatively, ticket feedback surveys can be edited while creating the ticket task. Click Edit survey after selecting the ticket feedback survey that you would like to update.
Exporting and Importing Ticket Feedback Surveys
Ticket feedback surveys can be exported as a QSF and imported into other accounts. Exporting to QSF is a useful tool to backup your ticket feedback survey or transfer a copy into another Qualtrics account. For more information, see Import & Export Surveys.
